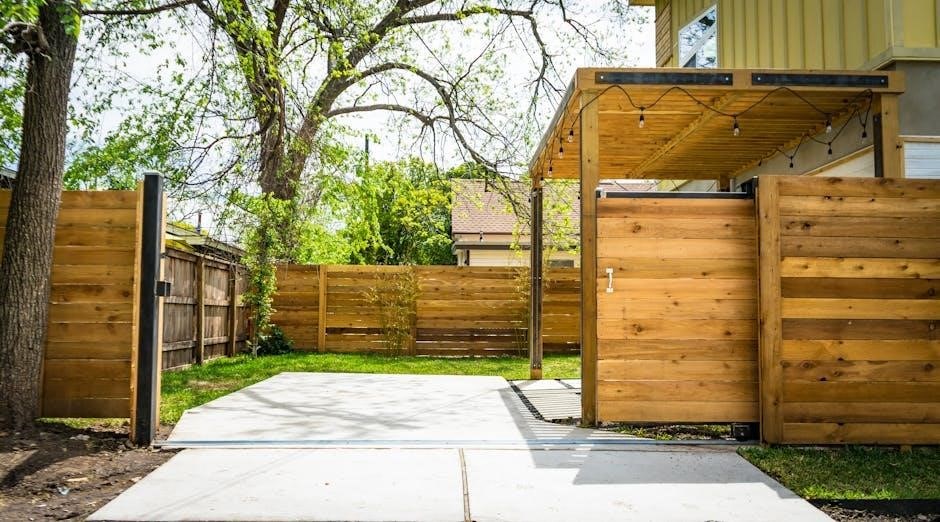

A 16×20 pergola offers a spacious‚ shaded outdoor area perfect for entertaining or relaxing. Its large footprint and modern design make it a versatile backyard structure. Detailed plans guide DIY enthusiasts through building a durable‚ stylish pergola with precise measurements and materials lists‚ ensuring a professional-grade result.
What is a Pergola and Why Choose a 16×20 Size?
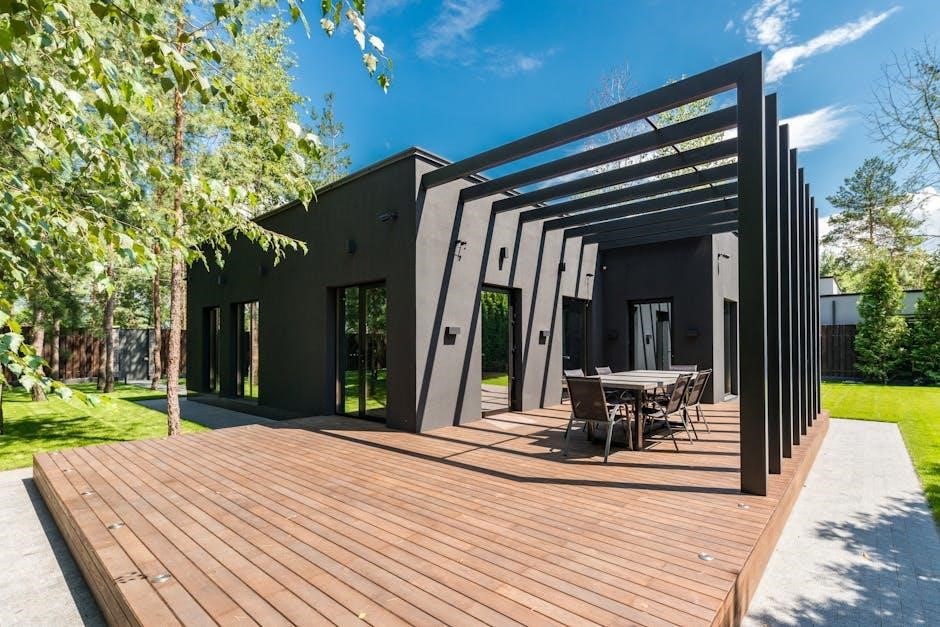
A pergola is an outdoor structure with an open roof‚ typically consisting of posts and crossbeams‚ designed to provide shade and enhance aesthetic appeal. The 16×20 size is ideal for creating a spacious‚ functional outdoor area‚ offering ample coverage for entertaining or relaxation. This size strikes a balance between grandeur and practicality‚ making it suitable for both small and large yards. Its modern design complements various architectural styles‚ while its budget-friendly construction ensures affordability without compromising quality. The 16×20 pergola is versatile‚ accommodating seating areas‚ dining spaces‚ or even outdoor kitchens‚ making it a popular choice for homeowners seeking to elevate their backyard living experience.
Overview of the Benefits of a DIY Pergola Project
Embarking on a DIY pergola project offers numerous benefits‚ including cost savings and the satisfaction of creating a custom outdoor space. With detailed plans and pre-drilled materials‚ assembling a pergola becomes accessible even for those with limited woodworking experience. DIY projects allow for personalization‚ enabling homeowners to tailor the design to their preferences and yard layout. Additionally‚ building a pergola enhances your DIY skills and provides a sense of accomplishment. The step-by-step instructions and precise measurements ensure a professional-grade result‚ making the project both rewarding and practical. This approach not only beautifies your backyard but also increases your home’s value‚ offering long-term benefits for years to come.
Materials and Tools Required
Building a 16×20 pergola requires 6×6 posts‚ 2×12 beams‚ 2×8 rafters‚ and necessary hardware like screws and brackets. Essential tools include a drill‚ saw‚ and level.
Lumber Specifications: Posts‚ Beams‚ and Rafters
The 16×20 pergola requires specific lumber for durability and structural integrity. Posts are typically made from 6×6 pressure-treated lumber for stability and ground contact. Beams‚ which span the posts‚ are constructed from 2×12 lumber‚ providing strength and support for the rafters. Rafters‚ the horizontal shade elements‚ are usually 2×8 or 2×6 boards‚ spaced evenly to create the desired shade pattern. Proper lumber selection ensures the pergola withstands weather conditions and supports additional elements like lighting or decorations. Precise measurements and quality materials are essential for a professional-grade finish and long-lasting performance.

Hardware and Fasteners Needed for Assembly
Assembling a 16×20 pergola requires specific hardware and fasteners to ensure stability and durability. Galvanized or stainless steel lag screws and bolts are recommended for securing posts and beams‚ resisting corrosion and providing a strong hold. Post anchors are essential for anchoring the 6×6 posts to the concrete footings‚ ensuring a solid foundation. Wood screws and brackets are used to attach rafters to the beams‚ while carriage bolts reinforce critical joints. High-quality weather-resistant fasteners are crucial for withstanding outdoor elements. Proper hardware selection ensures the structure remains secure and weather-tight‚ guaranteeing years of reliable performance. Always follow the plan’s specifications for hardware to maintain structural integrity and safety.
Step-by-Step Instructions
Detailed guides outline the process‚ from site preparation to final assembly. Follow clear steps for setting posts‚ installing beams‚ and securing rafters to create a sturdy pergola frame.
Preparing the Site and Laying the Footprint
Start by clearing the area of debris and vegetation. Mark the 13ft x 17ft footprint using stakes and twine‚ ensuring the corners form right angles. Verify the site is level‚ making adjustments as needed. Check for underground utilities before digging. The footprint matches the base of the 16×20 pergola‚ providing a stable foundation. Use a carpenter’s level to ensure accuracy and a measuring tape for precise marking. Proper site preparation ensures the pergola stands level and secure. Once the footprint is marked‚ you’re ready to begin constructing the base and setting the posts. This step is crucial for the structural integrity of the pergola and ensures a professional-grade finish.
Constructing the Base and Setting the Posts
Begin by constructing the base using 6×6 lumber‚ ensuring it aligns with the previously marked 13ft x 17ft footprint. Dig holes for the posts‚ approximately 12 inches deep‚ and pour concrete footings to secure them. Place the posts in the holes‚ ensuring they are straight and level. Attach the base beams to the posts using lag screws or brackets‚ spacing them evenly to support the rafters. Double-check the structure for levelness and security before proceeding. This step is crucial for the structural integrity of the pergola and ensures a stable foundation for the entire structure.
Installing the Double Support Beams
Once the posts are set‚ attach the double support beams‚ typically made from 2×12 lumber‚ to the top of the posts using high-quality lag screws or structural brackets. These beams provide additional structural support and ensure the pergola remains stable under various weather conditions. Position the beams evenly‚ spacing them approximately 16 to 20 inches apart‚ depending on the design. Use a level to ensure proper alignment and tighten all hardware securely. Double-check the measurements and spacing before moving forward‚ as this step is critical for distributing weight evenly across the structure. Proper installation of the double support beams ensures a sturdy base for the rafters and shade elements‚ enhancing both functionality and aesthetics.
Adding the Shade Elements and Rafters
After securing the double support beams‚ begin installing the rafters‚ typically made from 2×8 or 2×6 lumber‚ depending on the design. Space the rafters evenly‚ usually 16 to 20 inches apart‚ to create the desired shade pattern. Attach the rafters to the support beams using weather-resistant screws or nails‚ ensuring they are level and securely fastened. For added stability‚ consider overlapping the rafters slightly at the edges. Once the rafters are in place‚ add any additional shade elements‚ such as lattice panels or slats‚ to enhance the structure’s aesthetic and functionality. Finally‚ inspect the entire assembly to ensure proper alignment and tighten any loose connections. This step completes the pergola’s framework‚ ready for finishing touches like sealing or decorative trim.

Design and Customization Options
A 16×20 pergola offers design flexibility‚ allowing customization with various materials‚ styles‚ and decorative elements. Choose from modern or traditional aesthetics‚ incorporating features like lighting or trim for enhanced functionality and visual appeal.
Modern vs. Traditional Design Choices
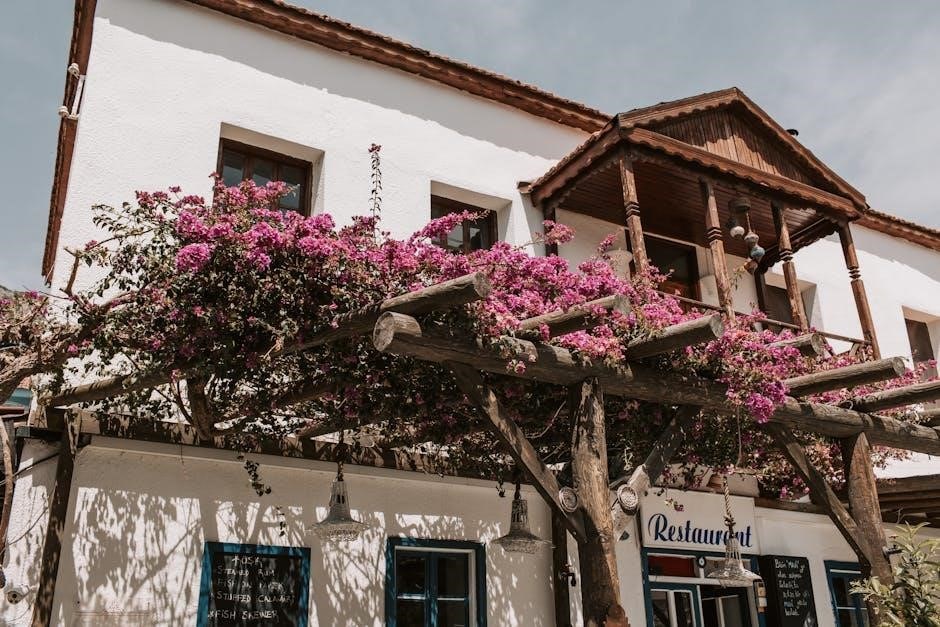
When building a 16×20 pergola‚ choosing between modern and traditional designs depends on personal style and outdoor space aesthetics. Modern designs often feature sleek lines‚ minimalist details‚ and materials like vinyl or metal‚ offering a contemporary look. In contrast‚ traditional designs emphasize classic elements such as intricate woodwork and natural finishes‚ creating a timeless appeal. Both styles can be customized with decorative elements like trim and lighting to enhance functionality and visual impact. The choice between modern and traditional influences the overall ambiance‚ ensuring the pergola complements surrounding architecture while providing a functional and beautiful outdoor structure.

Adding Decorative Elements like Trim and Lighting
Enhance your 16×20 pergola with decorative elements like trim and lighting to create a personalized and inviting space. Trim adds a polished finish‚ whether you opt for simple or intricate designs‚ and can be applied to beams‚ posts‚ or rafters for a cohesive look. Lighting‚ such as string lights‚ fairy lights‚ or built-in LED strips‚ transforms the pergola into a warm and welcoming area perfect for evening gatherings. These elements not only add visual appeal but also extend the functionality of your outdoor structure‚ making it a charming focal point in your backyard. Customize with paint‚ stains‚ or additional decor to match your desired aesthetic‚ ensuring your pergola stands out as a beautiful and functional retreat.

Final Touches and Maintenance
Seal the wood to protect it from weather‚ and regularly inspect for damage; Clean surfaces and tighten fasteners as needed to ensure the pergola remains sturdy and attractive.
Sealing and Protecting the Wood
Sealing and protecting the wood is essential for ensuring the longevity of your 16×20 pergola. Use a high-quality wood sealant or stain to guard against moisture and UV damage. Apply the sealant evenly‚ following the manufacturer’s instructions‚ and allow it to dry completely before using the pergola. Regular reapplication every few years will maintain the wood’s integrity and appearance. Additionally‚ consider using a water-repellent coating to prevent warping and rot. Proper protection will help your pergola withstand harsh weather conditions and remain a beautiful addition to your outdoor space for years to come.
Regular Maintenance Tips for Longevity
Regular maintenance is key to extending the life of your 16×20 pergola. Inspect the structure annually for signs of wear‚ such as loose fasteners or rotting wood‚ and address them promptly. Clean debris from the rafters to ensure proper water runoff and prevent mold growth. Trim nearby vegetation to avoid damage from overgrown branches. Touch up any areas where the sealant or paint has worn off to maintain protection against the elements. By following these simple maintenance steps‚ you can ensure your pergola remains sturdy‚ attractive‚ and functional for many seasons. Consistent care will safeguard your investment and preserve the beauty of your outdoor space.
Building a 16×20 pergola is a rewarding DIY project that enhances your backyard with shade and style. With detailed plans‚ you can achieve professional-grade results effortlessly.
Building a 16×20 pergola offers numerous benefits‚ including creating a shaded outdoor space‚ enhancing your home’s curb appeal‚ and providing a versatile area for entertaining or relaxation. The detailed plans ensure a budget-friendly and durable structure‚ while the modern design adds aesthetic value. With pre-drilled holes and high-quality materials‚ DIY enthusiasts can achieve professional-grade results. The project is rewarding‚ requiring minimal maintenance and offering long-lasting enjoyment. Whether for leisure or hosting‚ this pergola is a timeless addition to any backyard‚ blending functionality and style seamlessly. Embrace the satisfaction of creating your own outdoor oasis with these comprehensive 16×20 pergola plans.