

Learn how to effectively use the self-cleaning feature on your GE gas range, designed to simplify oven maintenance․ This guide provides step-by-step instructions, safety tips, and troubleshooting solutions․
Overview of the Self-Cleaning Feature
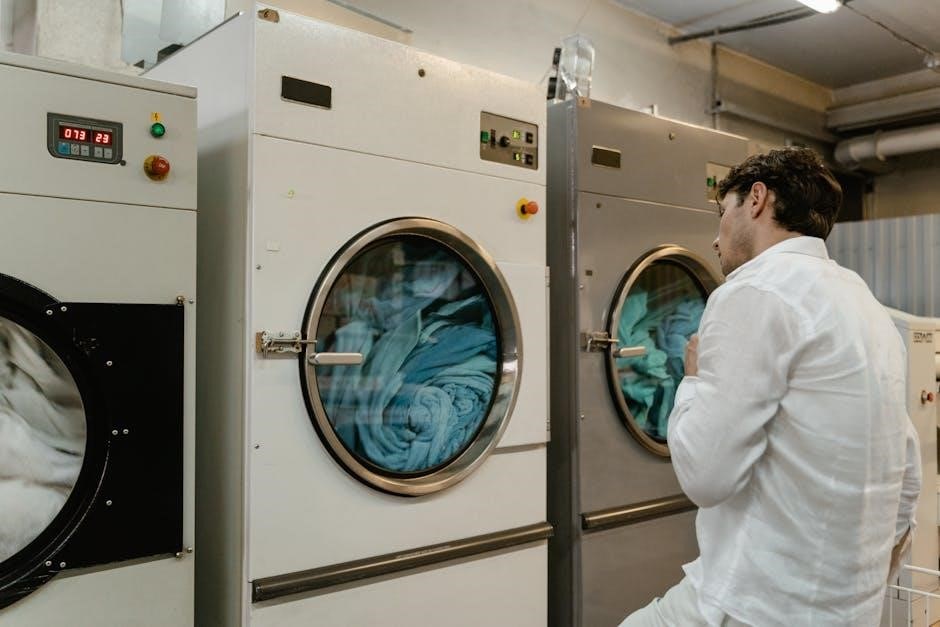
The self-cleaning feature on GE gas ranges simplifies oven maintenance by using high temperatures to burn away food residue, leaving behind a manageable ash․ This process eliminates the need for harsh chemicals, making cleaning more efficient․ For lighter messes, the steam clean option offers a quicker alternative by loosening spills with water vapor․ Both methods ensure a cleaner oven with minimal effort․ Always follow safety guidelines, such as avoiding door opening during cleaning and ensuring proper ventilation, to maximize safety and effectiveness․
Importance of Regular Cleaning for Gas Ranges
Regular cleaning is essential for maintaining your GE gas range’s performance and safety․ Food residue can build up over time, potentially causing unpleasant odors, smoke, and even fires․ A clean oven ensures efficient heating, prevents damage to internal components, and reduces the risk of gas leaks․ Cleaning after each use, especially heavy-duty cooking, helps maintain hygiene and prevents stubborn stains․ Proper maintenance also extends the lifespan of your appliance and keeps it functioning optimally․ Always follow recommended cleaning schedules and safety guidelines to ensure a safe and efficient cooking experience․
Preparation for Self-Cleaning
Preparation involves removing racks, pans, and accessories, lightly cleaning the oven, and ensuring proper ventilation for a safe and effective self-cleaning process․
Removing Racks, Pans, and Accessories
Before initiating the self-cleaning cycle, remove all racks, pans, and accessories from the oven to ensure proper cleaning and avoid damage․ Check your GE manual to confirm if racks need to be removed for your specific model․ Use a soft cloth to wipe down any exposed surfaces, including handles and knobs, to prevent residue buildup․ Ensure the oven is completely cool to avoid burns during preparation․ This step is crucial for a safe and effective self-cleaning process․
Cleaning the Oven Before Self-Cleaning Cycle
Before starting the self-cleaning cycle, remove large food debris and wipe down surfaces with a damp cloth or soft brush․ This prevents excessive smoke and ensures the cycle works efficiently․ Avoid using harsh chemicals or abrasive cleaners, as they can damage the oven’s finish․ For minor spills, consider using the steam clean option by pouring 1 cup of water into the oven bottom․ Clean the oven door and window to maintain visibility during the cycle․ Proper pre-cleaning ensures a more effective self-cleaning process and reduces residue buildup․
Ensuring Proper Ventilation in the Kitchen
Proper ventilation is crucial during the self-cleaning cycle to prevent smoke and fumes from spreading․ Open all windows and doors to allow fresh air to circulate․ Turn on your kitchen exhaust fan or range hood to help remove smoke and odors․ If possible, temporarily shut off air conditioning or heating vents to prevent fumes from spreading throughout the house․ Stay in the kitchen to monitor the process and ensure good airflow․ Proper ventilation ensures a safer and more efficient self-cleaning experience, reducing lingering smells and potential hazards․
Safety Instructions for Self-Cleaning
Always follow safety guidelines when using the self-cleaning feature․ High temperatures can cause burns․ Ensure proper ventilation and avoid opening the oven door during the cycle․
Understanding High-Temperature Risks
The self-cleaning cycle operates at extremely high temperatures, posing burn risks․ Never touch oven surfaces during or immediately after cleaning․ Keep children away․ Open windows for ventilation to prevent gas buildup․ Avoid introducing fresh air suddenly, as it may cause flames․ Ensure the oven is cool before cleaning․ Always follow safety guidelines to prevent accidents and ensure a safe cleaning process․ Proper precautions help protect both you and your appliance from potential damage․
Preventing Accidents During the Cycle
To ensure safety, keep the oven door closed and avoid touching hot surfaces․ Never leave the kitchen unattended during the self-cleaning process․ Keep children and pets away from the appliance․ Proper ventilation is crucial to prevent gas buildup․ Avoid introducing fresh air suddenly, as it may cause flames․ Do not use the stovetop during the cycle․ Always follow the manufacturer’s guidelines to prevent accidents and ensure a safe cleaning process․ Adhering to these precautions helps protect both you and your appliance from potential damage or harm․

Step-by-Step Self-Cleaning Instructions
- Ensure the oven is cool before starting the cycle․
- Remove racks, pans, and accessories from the oven․
- Pour 1 cup of water into the oven bottom for steam cleaning․
- Set the controls to the self-clean or steam clean option․
- Let the cycle run, allowing food residue to soften and burn away․
Setting the Self-Clean Cycle on Mechanical Controls
To initiate the self-cleaning process on a GE gas range with mechanical controls, first ensure the oven is cool․ Remove all racks, pans, and accessories․ Locate the temperature knob and turn it to the “Clean” position․ If your model has a specific Clean setting, select it․ The oven will automatically lock, and the cycle will begin․ The oven will heat to high temperatures to burn away food residue․ The cycle typically lasts 3-4 hours․ Once complete, let the oven cool before wiping down surfaces․ Always wear oven mitts when handling hot components; Ensure proper ventilation during the cycle to avoid fumes․
Using the Steam Clean Option for Minor Spills
The Steam Clean feature on your GE gas range is ideal for minor spills and quick cleanups․ To use this feature, pour one cup of water into the bottom of a cool oven․ Close the oven door and select the Steam Clean function․ The cycle lasts approximately 30 minutes, using steam to loosen food residue․ Once the cycle completes, let the oven cool slightly before wiping down surfaces with a damp cloth․ This method avoids the high temperatures of the full self-clean cycle, making it perfect for light cleaning․ Always ensure the oven is cool before starting the Steam Clean option for safety and effective results․

Maintenance After Self-Cleaning
After the self-cleaning cycle, clean the oven door and window using a damp cloth․ Wipe down all surfaces to remove residue, ensuring a spotless finish․
Cleaning the Oven Door and Window
After the self-cleaning cycle, allow the oven to cool completely before cleaning the door and window․ Use a damp cloth to wipe away residue․ For tougher stains, mix baking soda and water to create a paste, apply it to the area, and let it sit before scrubbing․ Avoid using harsh chemicals or abrasive materials, as they may damage the glass or finishes․ Regularly cleaning the door and window ensures optimal visibility and maintains the oven’s appearance․ This step is essential for long-term maintenance and functionality․
Wipe Down Surfaces After the Cycle
After the self-cleaning cycle, let the oven cool completely before wiping down surfaces․ Use a damp cloth to remove ash and residue from the oven walls, floor, and racks․ For tougher stains, mix baking soda and water to create a paste, apply it to the area, and let it sit before wiping clean․ Avoid using abrasive cleaners or scrubbers, as they may damage the finish․ Regularly wiping down surfaces after the cycle helps maintain the oven’s appearance and ensures optimal performance․ This step is crucial for keeping your GE gas range in top condition․

Troubleshooting Common Issues
Address common issues like lingering odors or incomplete cleaning by checking ventilation, ensuring proper cycle completion, and cleaning residue thoroughly after the process․
What to Do If the Oven Smells Like Gas
If your GE gas range oven emits a gas odor, immediately stop any cooking or cleaning processes․ Do not attempt to ignite any appliance or use electrical switches․ Turn off the gas supply valve and open windows for ventilation․ Ensure the oven and burners are cool before investigating․ If the smell persists, contact a professional for assistance․ Always prioritize safety when dealing with gas-related issues to prevent potential hazards․
Resetting Alarm Signals and Filters
After completing the self-cleaning cycle, reset your GE gas range’s alarm by turning off the oven and ensuring it has cooled․ Press and hold the “Clear/Off” button for a few seconds until the alarm stops․ For models with electronic controls, refer to the manual for specific reset instructions․ Clean or replace filters as needed to maintain proper ventilation․ Regular maintenance ensures your range operates efficiently and safely, preventing future issues during self-cleaning cycles․
Frequently Asked Questions
Explore common queries about GE gas range self-cleaning, including cycle duration, safety measures, and stovetop usage during cleaning․ Find answers to ensure optimal performance and safety․
How Long Does the Self-Clean Cycle Take?
The self-cleaning cycle duration varies depending on the model and level of soil․ Standard self-cleaning cycles typically last 2 to 4 hours, while steam cleaning cycles are shorter, around 30 minutes․ Ensure the oven is cool before starting the cycle and avoid interrupting it once begun․ Proper preparation, like removing racks and large debris, helps the cycle run efficiently․ Always refer to your specific GE model’s manual for exact timing and instructions․ This ensures optimal cleaning and safety during the process․
Can I Use the Stovetop During Self-Cleaning?
Using the stovetop during the self-cleaning cycle is not recommended․ The high heat generated by the self-cleaning process can affect burner performance and safety․ Additionally, fumes from the cleaning cycle may interact with the stovetop flames, creating unpleasant odors or hazards․ It’s best to avoid using the stovetop until the cycle is complete and the oven has cooled․ Always follow the manufacturer’s guidelines for safe and efficient operation of your GE gas range during the self-cleaning process․
Regular self-cleaning ensures optimal performance of your GE gas range․ For detailed guidance, refer to the official GE manual or visit their support website for additional resources․
Final Tips for Effective Self-Cleaning
For optimal results, clean the oven after each use to prevent food buildup․ Use the steam clean option for minor spills to avoid long cycles․ Always let the oven cool naturally after self-cleaning to prevent damage․ Ensure proper ventilation by opening windows and turning on exhaust fans․ Regularly inspect and clean door seals to maintain heat efficiency․ Avoid using harsh chemicals, as they can damage the finish․ Refer to your GE manual for model-specific tips and guidelines to keep your gas range in excellent condition․
Recommended GE Manuals and Guides
Refer to the official GE Appliances website for detailed manuals tailored to your specific gas range model, such as PGB935 or JGB735․ These guides provide comprehensive instructions for self-cleaning, troubleshooting, and maintenance․ Additionally, explore the GE Self-Cleaning Gas Ranges manual, which covers models like JGB660 and PGB935, offering insights into operating and cleaning processes․ For further assistance, visit the GE support page or consult the “Before You Call For Service” section in your manual for quick solutions to common issues․